Uncategorized Archive

Clothing Labels — a CQ treasure and Giveaway.

Posted June 12, 2011 By FairyKateH

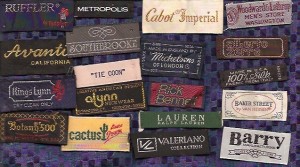
        Is it just me, or do other people collect clothing labels like I do?   I am convinced that “someday” I will figure out a way to use clothing labels as embellishments in a CQ block. 

        When I buy clothes, I look for color, fit and comfort, but I also look at the clothing label to see what it looks like, not just to see what brand it is.   On rare occassions, I’ve actually considering buying a shirt just BECAUSE I liked the clothing label.  (gggrin!)  These labels usually mention environmental issues or world peace or believing in yourself.

       Luckily, I’ve come to my senses and not bought these shirts because they didn’t fit as well as I would have liked.  But it was a tough call for a few minutes.  I reeeeeeally wanted those labels for my collection. 

      If you are a “clothing label” fanatic like I am, please leave a note describing what you do with your labels.  I will choose the person with the most unique idea for the  use of labels and send you a small baggie full —  “FREE OF CHARGE” anywhere in the world. 

     Leave a note telling me how you use labels.  I will choose a winner on Sunday morning, June 19th.  For those of you on the other side of the Big Pond, I live in the Central Standard time zone in the U.S. if that helps.

1 Comment. Join the Conversation

WINNER of the May Monthly Drawing

Posted June 6, 2011 By FairyKateH

The winner of the first monthly drawing for $20 of crazy quilt supplies is Dorothy Carroll of Virginia.

Here is Dotty’s reply when she received her squishie full of CQ goodies:

I received your “goody” envelope and thank you so very much The items will be put to good use. I am planning a parasol girl quilt to be all velvet and most of the items you sent will be used to decorate her dress. ThANK YOU so very much.


Dottie
 
Be the first to comment

Hankies, just gotta love ‘em.


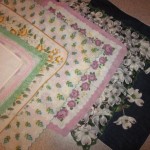
            Time to take a trip down memory lane.  Do you remember the days when everyone carried a cloth hankie?  I spent many an hour ironing my father’s handkerchiefs when I was a child, but I do not recall my mother using them.

            When my grandmother-in-law passed away and we were going through her things, her daughter, my mother-in-law brought a large handful of grandma’s handkerchiefs to me.  Her thought was, “they’re pretty and they are fabric.  You must be able to use them somehow.”  I wasn’t so sure, but I took them home with me to remind me of Grandma.

            It wasn’t till I began crazy quilting that I learned just how to use a tiny work of art like a woman’s hankie.  I met a teacher named Cindy Brick who wrote a wonderful book called, “Hankie Pankey Crazy Quilts”.  Cindy makes the most “exquisite crazy quilts” using bits and pieces of cut-up hankies.  Check out her book on Amazon.com. 

http://www.amazon.com/s/ref=nb_sb_noss?url=search-alias%3Daps&field-keywords=Cindy+Brick++Hankey+Pankie+Crazy+Quilts&x=7&y=21 

For more info about Cindy, here’s her website.  http://cindybrick.com/

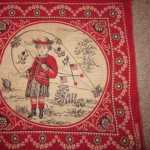
            Anyway, one of Grandma’s hankies looked a bit unusual; it was obviously very, very old.  It even said “turkey red” on the side of it which I believe was a very old form of red dye.

            Cindy told me it was made before the turn of the century and at auction, could bring more than thirty dollars.  I know that “finding value” in such trivial things as an “old snot rag” depends on the person looking at the object in question, but what I’m saying is, “don’t turn your nose up at a bunch of old hankies” at the next auction or estate sale you attend.  You might find something of great value.  The value of some old hankies is nothing to “sneeze at”.  The beauty of some of these tiny pieces of art for your nose might “bring you to tears”.  (okay…okay…I’m done.  GGGrin!) 


Be the first to comment

How do Buttons make “You” feel?

Posted May 29, 2011 By FairyKateH

     Buttons.  Buttons.  Buttons.  For some, that word just means you can keep your pants up or stop your shirt from gaping open, but to a select group of people, the word – button — means so much more.  It makes them feel good, causes goose bumps on their forearms and a giddy feeling in the pit of their stomach.  They revel in the pleasure buttons give to them.  Well, at least that happens for my friend, Jennie. 

     A few days ago, Jennie shared her button collection with me.  I knew it was big, but oh MY gosh!  In my previous posting, I shared a photograph where she displayed her “good” buttons on the kitchen table.

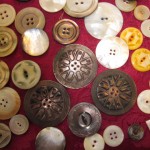
     She laid the buttons in groupings for me to admire.  Mother of Pearl, metal, jet (black glass), Bakelite (an early and creative form of plastic buttons), military/fire department/and police buttons, ceramic, and many more.  I had to laugh as she pointed to each set of buttons in turn and said, “These are my FAVORITE buttons.”  She just loves them all.

     I’ll share a few more photos as we go and a bit of the history of buttons over the next few “button blog blurbs”.

     Did you know that Muscatine, Iowa is considered to be the Button Capital of the World?  A button maker from Europe arrived in Muscatine in 1887 and by 1905, that small town in Iowa was out-producing many established button businesses in Europe, making over 1.5 billion buttons a year.  Just thought I’d share that little tidbit.  I didn’t know it either, till Jennie shared her love of buttons.

     (My personal favorites are the carved mother of pearl buttons.  I’ll be sharing more photos of those in later posts) 

Please leave your button stories here.  I never hear enough about buttons.  I LOVe buttons too.

1 Comment. Join the Conversation

Button Collection Extraordinaire

Posted May 27, 2011 By FairyKateH
Jennie's Button Collection.

Do “you” love buttons?  My friend, Jennie, LOVES buttons as you can see from the photo here.  She agreed to share a few photos of her favorites with you, my other friends. 

When I arrived, Jennie’s boyfriend said, “Oh…you’re here to admire the buttons, aren’t you.  Lucky you!  You’re in for a treat.”  I walked into the dining room and there on her table was a display of buttons that truly impressed me.  I haven’t had time to write about them yet, but I thought I’d share a photo and get down to writing about it this weekend.    Enjoy!
1 Comment. Join the Conversation

Embarressing Your Buttons – – A CQ No-No!

Posted May 22, 2011 By FairyKateH


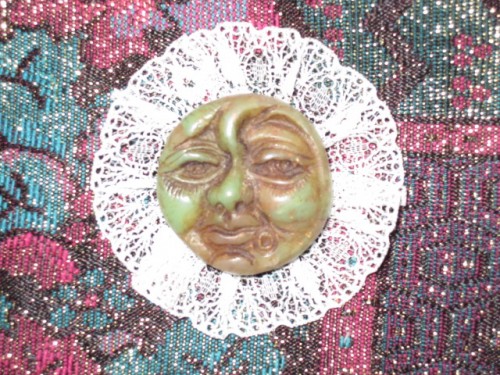
I just had to share a quick photo of “what NOT to do with your buttons”.  You should NEver EVer embarrass your buttons in any way . . . see attached photo.

In my previous blog post, I showed what you can do with a piece of lace to enhance a shank button and make it hang properly without tilting when it is used on a wall hanging.

In my search for the right button to show off the lace, I found a face button and laid it in the middle of the rosette.  What do you think?  She looks a wee bit annoyed, eh?  (insert sounds of chuckling here)

2 Comments so far. Join the Conversation

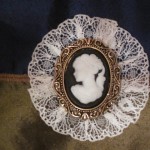
Lace Motif for CQ

Posted May 20, 2011 By FairyKateH

Do you remember the dream I told you about in the “previously published” blog post, “Spaghetti and Buttons”.   Well, I finally had time to actually make the lace motif I mentioned in that post and thought I’d share a few photos of it.


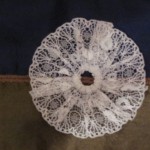
 My dream worked perfectly. I used 8 inches of one inch wide lace.  The finished product was a 2-inch rosette made of lace. For a more delicate-looking and smaller motif, I would suggest 6 to 8 inches of ½ inch lace.


If you wish to use very tiny shank buttons as a centerpiece in the lace rosette, you might be able to use ¼ inch lace, but that would be subject to “trial and error” to see whether  you would drive yourself crazy trying to baste such a tiny motif.


 I used a piece of one inch wide lace – – 8 inches long. For the wider lace, it is imperative to use this much or the lace rosette will not be full enough to support the edges of your shank button. When using narrower lace, you can experiment with the length to see what you need.


 Put the right sides of the lace together. Starting at the scalloped end of the lace, slide the needle with matching thread through near the end. Tie the thread together and cut off the end of the thread so there is just a small tail left. Whip stitch the lace together, hiding the small tail of thread in the stitches. That way, the knot will not come undone.


Then, baste around the flat edge of the lace being “very, VERY careful not to shove the sharp end of the needle” under your cuticle. (Can you tell there was an “incident” during the making of this lace rosette?) Who knew having a blog could be dangerous to my health and cuticles?


 Pull the thread up tight. The lace will draw up into a small circle. Make sure to leave a small opening so the shank of the button will fit inside. Anchor the thread and enjoy your handiwork.

(If you are bleeding like I was by the time I finished this piece, NOW is a GOOD time to staunch the flow of blood before you mess up your pretty white lace.)


 Lay the shank button on your handiwork and admire. Use as desired to embellish your CQ.

2 Comments so far. Join the Conversation
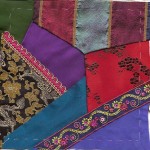
How many people out there machine piece their crazy quilt blocks? Raise your hands. Hmmm…eight…twelve….forty-seven…and many, many more. Wow…there’s quite a few of you out there.

The reason I asked is because although I know a lot of women machine piece their blocks, I have always made my crazy quilt blocks by hand. I like hand stitching and I really like how each of my CQ blocks looks different. It takes a bit longer to make each one, but the extra time spent is okay with me.


I just thought I’d share a few tips on how “I” piece by hand and see if I can find any converts to the “CQ hand-piecing way of life”. These are just a few suggestions on things I do to make hand piecing progress as fast as I can:


1.  Choose a color scheme.


2.  Depending on the size of the block (example: when piecing a 6 ½ inch square block), I would choose eight different fabrics. (I always choose one or two more fabrics than the length of the side of the block I’m making unless of course I’m piecing a block that’s forty-seven inches wide. Then I just use bigger pieces of fabric to cover the foundation.)


3.  Cut a center fabric. (I often use a 5-sided shape in the center of my block because it gives me lots of great looking angles in the block) If I am using a velvet fabric in my block, I often put it in the center because I do not have to fold the thick fabric over to make a seam allowance.


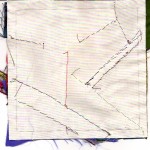
4.  Next, I fold seam allowances over on the edges of the larger pieces of fabric and iron them down. I cut off a piece of fabric with a seam allowance on it and lay it on the foundation fabric in a visually pleasing area.


5.  I continue to do this until I cover the entire foundation fabric. (Sometimes it will be necessary to iron an extra seam allowance down to cover the fabric adequately, but I believe in improvising if the situation warrants a change in the plan)


6.  Once the foundation fabric is completely covered, I pin the seam allowances down and use matching threads to hand stitch the foundation and fancy fabrics together.


I’d love to hear how “you” piece your blocks, whether by machine or by hand. Thanks for taking the time to respond.

5 Comments so far. Join the Conversation

Tatting—a short love story

Posted May 18, 2011 By FairyKateH
scan0001


    Do “you” love tattting as much as I do? There’s just something about those intricate knots and swirls of thread that amazes me. What I’d like to know is who invented this stuff out in the first place? Who developed the first tatting shuttle?  What person figured out how to hold their tongue just right so all the loops of thread, the knots, and the click of the tatting shuttle blend so beautifully to make a gorgeous motif?


          You do know, holding your tongue in the right position does help you tat, don’t you?  Personally, I haven’t got that part down yet.  Learning how to needle tat just about did me in.  I love the idea of tatting, but haven’t developed patience enough to perfect it. 


              I keep saying, someday, I’ll master this process. Someday, I will . . . I will . . . I will . . . ~~~!!!


              But until that day happens, I’ll be haunting antique malls, rescuing old tattting and loving it to pieces. I told a friend about someone I know who made a three-inch piece of tatting with silk thread. The pattern was so intricate that it took two hundred hours to complete. Yup, you heard me right!  Two hundred hours.  This was the most amazing piece of handwork I’ve ever seen in my life.   The smaller the thread, the more breathtakingly delicate the results and the longer it takes to complete.  She stored it in a plastic case to protect it. 


      My friend’s reply:   “Just an idea, Kate, but maybe the first 199 hours were spent learning how to hold her tongue just right.” Well . . . after seeing the end product, I believe she definitely got “that important part” of tatting down pat. 


      Please tell me your tatting stories.  I love hearing where you find “your” tatting treasures.  By the way, I’m sharing a photo of some different pieces of tatting I rescued.  You can see the delicacy of threads in the top two pieces as apposed to the lower piece of tatting.  Who says, “size doesn’t matter”.  GGGrin!

2 Comments so far. Join the Conversation

Embroidery Stitch Variation—Wagon Wheel

Posted May 15, 2011 By FairyKateH
 
I’ve never seen such an interesting version of the wagon wheel stitch.
 
For those of you who do not know how to make such perfect circles on a CQ block, this is how “I” do it.  I’m sure everyone has their own way of making circles on CQ and as long as it works for you, go for it.
 
I trace around a quarter to help make my circles the same size.  I’ve also used the cap to pill bottles for larger circles and on occassion, small cups for even larger circles.
 
I use a #2 pencil if the fabric is light enough, or a sharp white dressmaker’s pencil if the fabric is dark.  Keep the white pencil fairly sharp as when it gets dull, the markings become larger and harder to hide.
 
You can always wipe away the white markings, but some fancy fabrics are very delicate and the less pressure you have to use on them, the better.
 
Andrea used a chain stitch around the outside of the motif.  She made some larger spokes and filled in smaller stitches between the longer ones with a different colored and smaller size of thread. 
 
What a work of art!  Enjoy.


Embroidery Stitch -- Detached Wagon Wheel

Andrea Campbell of California used a very unusual stitch variation on her crazy quilt block which she has donated for a fundraiser.

3 Comments so far. Join the Conversation